UI pipeline Starter Tutorial
This starter tutorial shows you how to deploy a pipeline that multiplies a number by 2 twice using the UbiOps UI. In UbiOps it is possible to chain deployments together to form a pipeline, in this case the Multiplying a number ready deployment is chained together. In a pipeline, the output of the first deployment is the input of the second deployment and, so on. For more information about pipelines, you can visit our Pipelines documentation page.
Requirements
Running the example in UbiOps
To deploy this example to your UbiOps environment you can log in to the WebApp and create a new deployment by going to the deployment tab and hitting [+]Create.
You will be prompted to fill in certain parameters, like the name of the deployment, a description (this is optional), and you are required to define the input and output. The input and output field of the deployment defines what data the deployment expects when making a request i.e., run the model. The input for the first deployment is also the input for the pipeline, where the output of the last deployment is also the output of the pipeline.
Setting up your deployments
First deployment
The parameters for the first deployment are given in the table below.
You can use the following in step 1:
| Deployment configuration step 1 | |
|---|---|
| Name | multiplication-deployment-1 |
| Description | Multiplies input by a 2 |
| Input fields: | name = number, datatype = integer |
| Output fields: | name = number_multiplied, datatype = integer |

You can use the following in step 2:
| Deployment configuration step 2 | |
|---|---|
| Version name | v1 |
| Description | leave blank |
| Environment | Ubuntu 24.04 + Python 3-12 |
| Upload code | deployment zip do not unzip! |
| Request retention | full |
The advanced parameters and labels can be left as they are. They are optional.
Second deployment
For the second deployment, the following parameters can be used:
| Deployment configuration step 1 | |
|---|---|
| Name | multiplication-deployment-2 |
| Description | Multiplies input by a 2 |
| Input fields: | name = number, datatype = integer |
| Output fields: | name = number_multiplied, datatype = integer |
You can use the following in step 2:
| Deployment configuration step 2 | |
|---|---|
| Version name | v1 |
| Description | leave blank |
| Environment | Ubuntu 24.04 + Python 3-12 |
| Upload code | deployment zip do not unzip! |
| Request retention | Leave on default settings |
Again, the advanced parameters and labels can be left as they are, they are optional.
After uploading the code for the first deployment (deployment_package_1) and the second deployment (deployment_package_2), and with that creating the deployment versions UbiOps will start deploying. You can check the building process from the logs, building a deployment can take several minutes.
For more information about deployments in general, please visit our Deployments page. For more information about input and output, see our Deployment Input & Output page.
Building the pipeline
After the deployments have finished building, go to the pipeline tab and click [+]Create.
You can use the following for the pipeline:
| Pipeline configuration step 1 | |
|---|---|
| Name | multiplication-pipeline |
| Description | Multiplies input by 2 twice |
| Input fields: | name = number, datatype = integer |
| Output fields: | name = number_multiplied, datatype = integer |
Leave the version, labels, and Optional/Advanced settings as is and click Create.
Adding the deployments as objects
Now that the pipeline has been created, it is time to add the deployments that you have created as objects to the pipeline.
Do this by pressing the [+]Add new object and select multiplication-deployment-1 and version v1, do this for multiplication-deployment-2 as well. It is possible to edit the names of the objects but in this case, we leave them as is.
Connecting the objects
The final step is to create the connections. When clicking Create a connection you are asked to fill in the Source fields. This is where you can define how the output from the first deployment is connected to the input of the second deployment.
The order should be as follows:
| Pipeline order | |
|---|---|
| pipeline-start | multiplication-deployment-1-v1 |
| multiplication-deployment-1-v1 | multiplication-deployment-2-v1 |
| multiplication-deployment-2-v1 | pipeline-end |
After connecting the objects the pipeline should look like this:
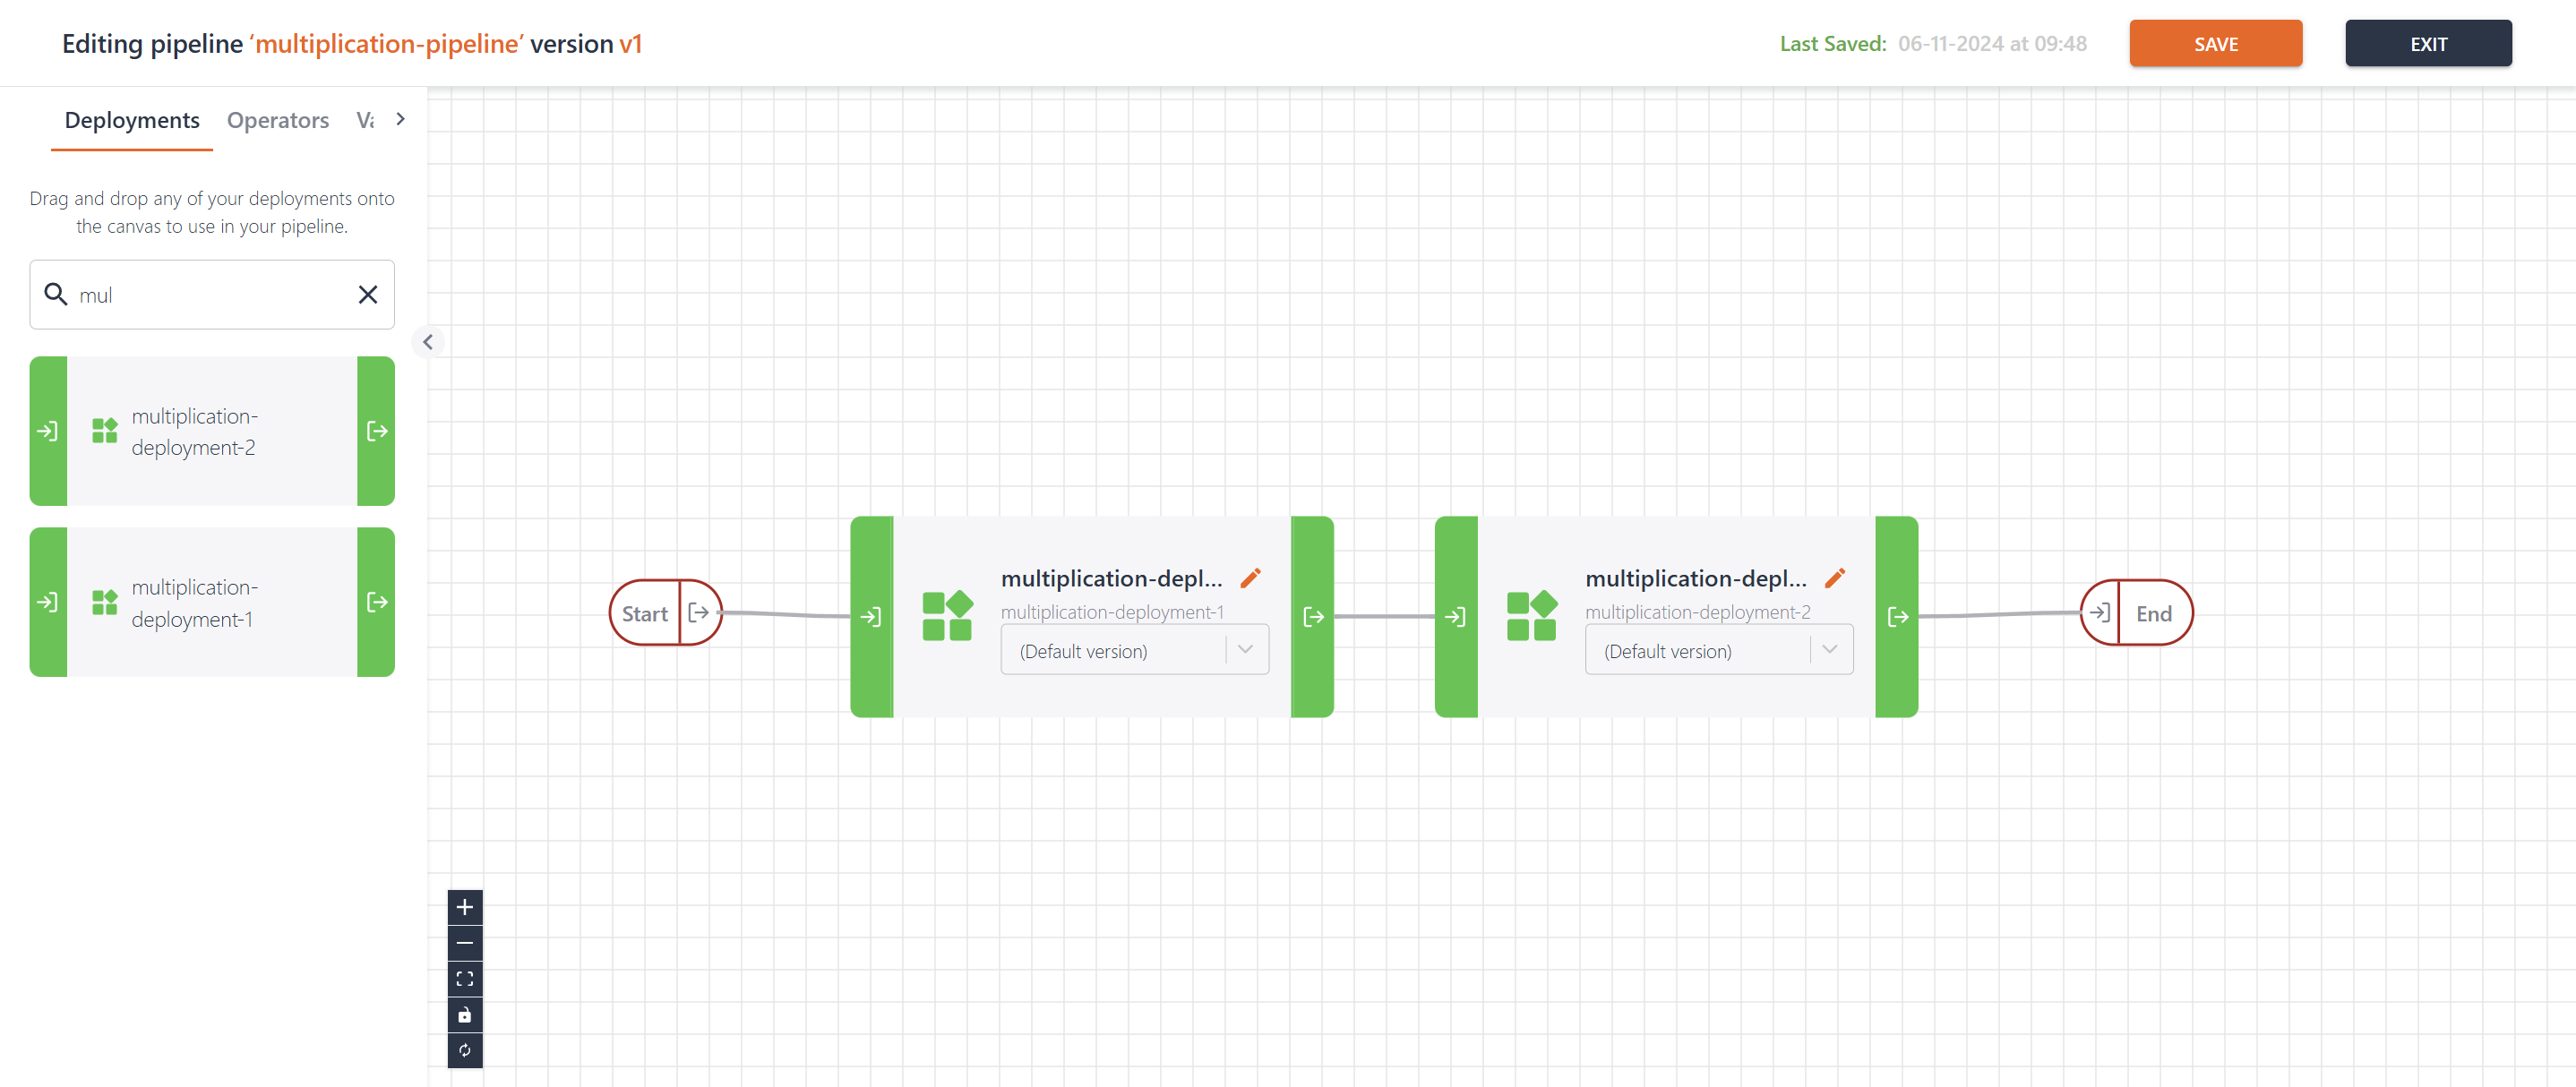
Now that your pipeline is up and running, you can make requests to it by clicking the Create Request and entering an integer.
Next steps
Adding a pipeline operator
In addition to adding deployments, you can also include operators in your pipeline. This section will guide you through adding a simple function operator.
To start, open your pipeline editor and locate the Operator option next to the Deployments option. Click on it, and then drag the "Apply a Function" operator onto the board. In the configuration window that appears, enter input*2 in the Expression field. Click "Add field" underneath Expression variables. Type name input and type integer. This simple function will double the input value. If you want to check whether everything is filled in correctly, you can try it out using "Test expression" where you can provide an input and check the result of the function. Finally, click Save to apply the changes.
Next, link the operator to your pipeline. Start by connecting the first deployment to the function operator to route its output. Then, establish another connection from the function operator to the second deployment.
That's it! You've successfully added a function operator to your pipeline. Now, data will flow from the first deployment, pass through the function where it gets multiplied by 2, and continue to the second deployment.
| Pipeline order | |
|---|---|
| pipeline-start | multiplication-deployment-1-v1 |
| multiplication-deployment-1-v1 | function |
| function | multiplication-deployment-2-v1 |
| multiplication-deployment-2-v1 | pipeline-end |
Exploring further
If you finished this starter tutorial and want to know how to create a pipeline using the client library, visit our GitHub and follow the example shown there.