Client library Starter Tutorial
This starter tutorial takes place in a self explaining Jupyter Notebook. The notebook uses the UbiOps client library to create a deployment.
Requirements
-
After you have made your account you need to install either the UbiOps Python client library. If you want to install the Python client library, run
pip install ubiops.
Create an API token
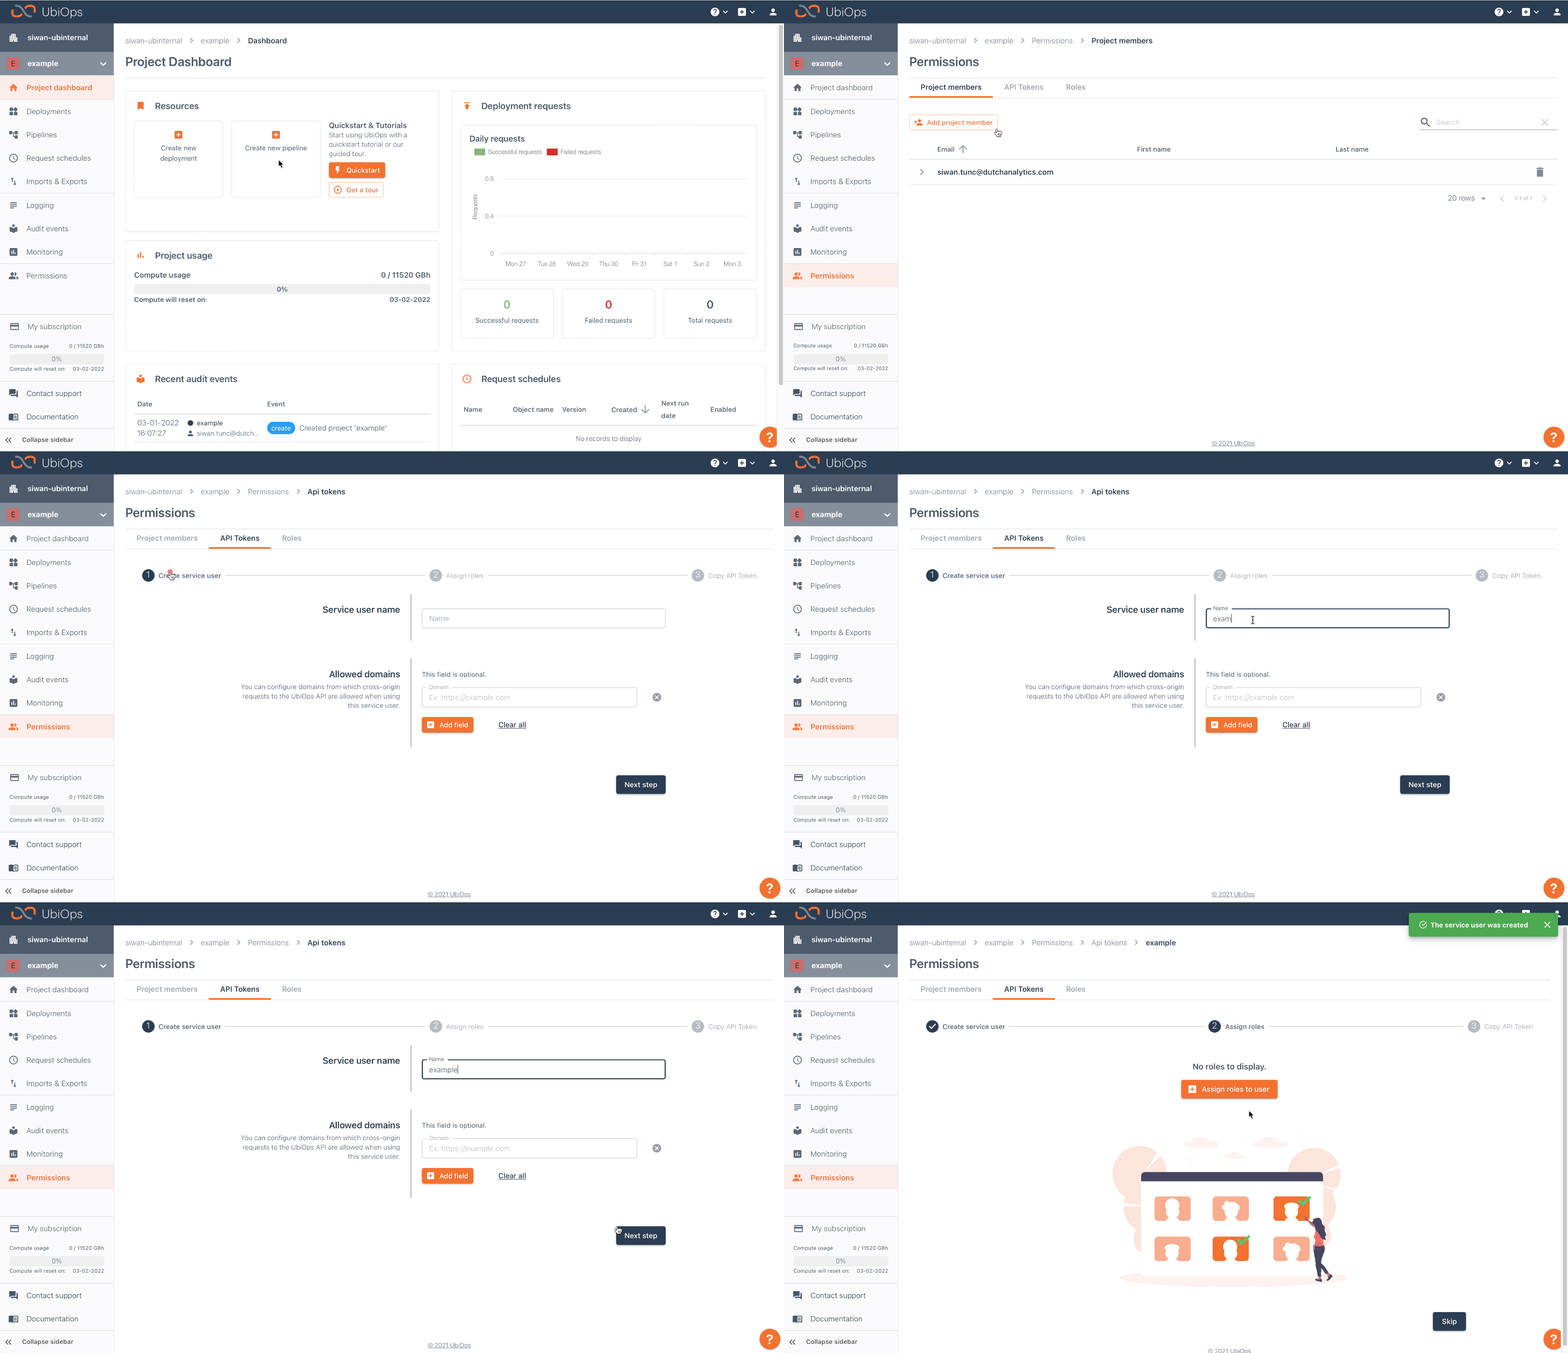
Before downloading the notebook you need to create an API token. The client library uses this token to securely authenticate with UbiOps.
To create a token go to the Users & permissions page. You can find it in the sidebar. On this page you can add a token by clicking the Add token button. Give your new token a name, assign the 'project-editor' role to the token and save the token in a safe place.

On this page you can add a token by clicking the Add token button. Give your new token a name, assign the 'project-editor' role to the token and save the token in safe place.
An example notebook
Download the Python notebook or if you do not have Jupyter Notebook installed you can take a look at the source on GitHub
Next steps
If you finished this starter tutorial and like the format you can take a look at our Tutorials page. This is collections of how-to's in the same format but with other examples and use-cases, including more complex examples.