Pipelines
Pipelines allow users to create modular workflows by connecting deployments, operators, experiments and sub-pipelines with one another. This is useful when your application depends on a series of separate data transformations that need to operate in sequence. This sequence does not have to be linear, but can also contain objects that run in parallel. UbiOps manages the dataflow between the objects in the pipeline, so there is no need to manually make separate deployment requests.
You can use a pipeline just like you would use a deployment - a pipeline has its own API endpoint. Deployments (or experiments) can be reused in multiple pipelines, or even multiple times in a single pipeline, which provides a lot of flexibility. Each deployment and/or experiment scales independently, and uses its own dependencies and base environment, independent of the other objects in the pipeline.
You can create and interact with your pipelines via the Python Client Library and Command Line Interface (CLI).
UbiOps provides several tutorials that explain how you can use pipelines with the UbiOps Client Library:
- Pipeline tutorial:
A tutorial that explains how to use all the different functionalities of pipelines. Doesn't provide a practical example, but solely focuses on the functionalities of pipelines. - Deploying a Scikit-Learn model:
A tutorial on how to deploy a Scikit-Learn model using the pipeline functionality of UbiOps.
Operators
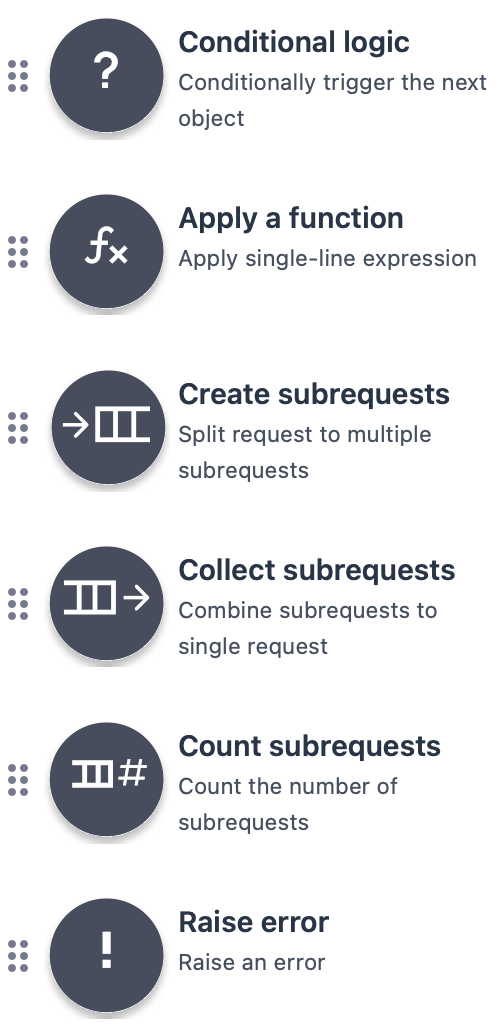
Operators are objects that you can add to your pipeline. Some operators can be used to add more complex logic to your pipeline, others can be used to make small data manipulations without the need of having to create a deployment for it. You can read more about the different type of operators UbiOps provides here. We also provide a Howto for each operator that explains how you can add them to your pipeline. These can be found here. Furthermore, for an implementation of the operators with the UbiOps Client Library, you can see these in action in the Pipeline tutorial once again.
Creating a pipeline
A new pipeline is created by going to Pipelines in the left navigation panel and then clicking the Create button. The pipeline input can be used as input for the object(s) in that pipeline. The pipeline input fields are often similar to the input fields of the first deployment in that pipeline. For more info about inputs, check out the In- and output pages. The deployment output connected to the pipeline end will be part of the pipeline request result. The pipeline output fields are often similar to the output fields of the last deployment in that pipeline. Note that it is not required to connect anything to the pipeline end, which can be relevant for batch processing jobs that write results to one of your databases. If you need help building your first pipeline into UbiOps, see our pipeline starter tutorial.
You can assign labels to your pipelines for easier filtering later. You may also want to give the pipeline an explanatory description.
Pipeline versions
As is the case with deployments, there can be multiple versions of a pipeline.
You can mark a version of a pipeline as the default version of that pipeline, which allows not having to specify the version when making a request to a pipeline. If left unspecified, the request will always go to the default version that is currently set.
There can only be one default version per pipeline at a time. If the default version is changed, it is effective immediately, meaning that any request after this moment will be directed to the new version. Note that already created but unprocessed batch requests will still be processed by the version that was the default when creating the batch request. Click on Edit in the Pipeline details page in the WebApp to change the default version of that pipeline, or use the row button in the Versions table.
The first version of a pipeline is always marked default.
To make a request to the default version, navigate to the Pipeline details page in the WebApp and click on Create Request.
See Monitoring for information on how to monitor your pipeline.
Referencing a default pipeline version
The default version of a pipeline can be used in a direct and batch request and when creating a request schedule.
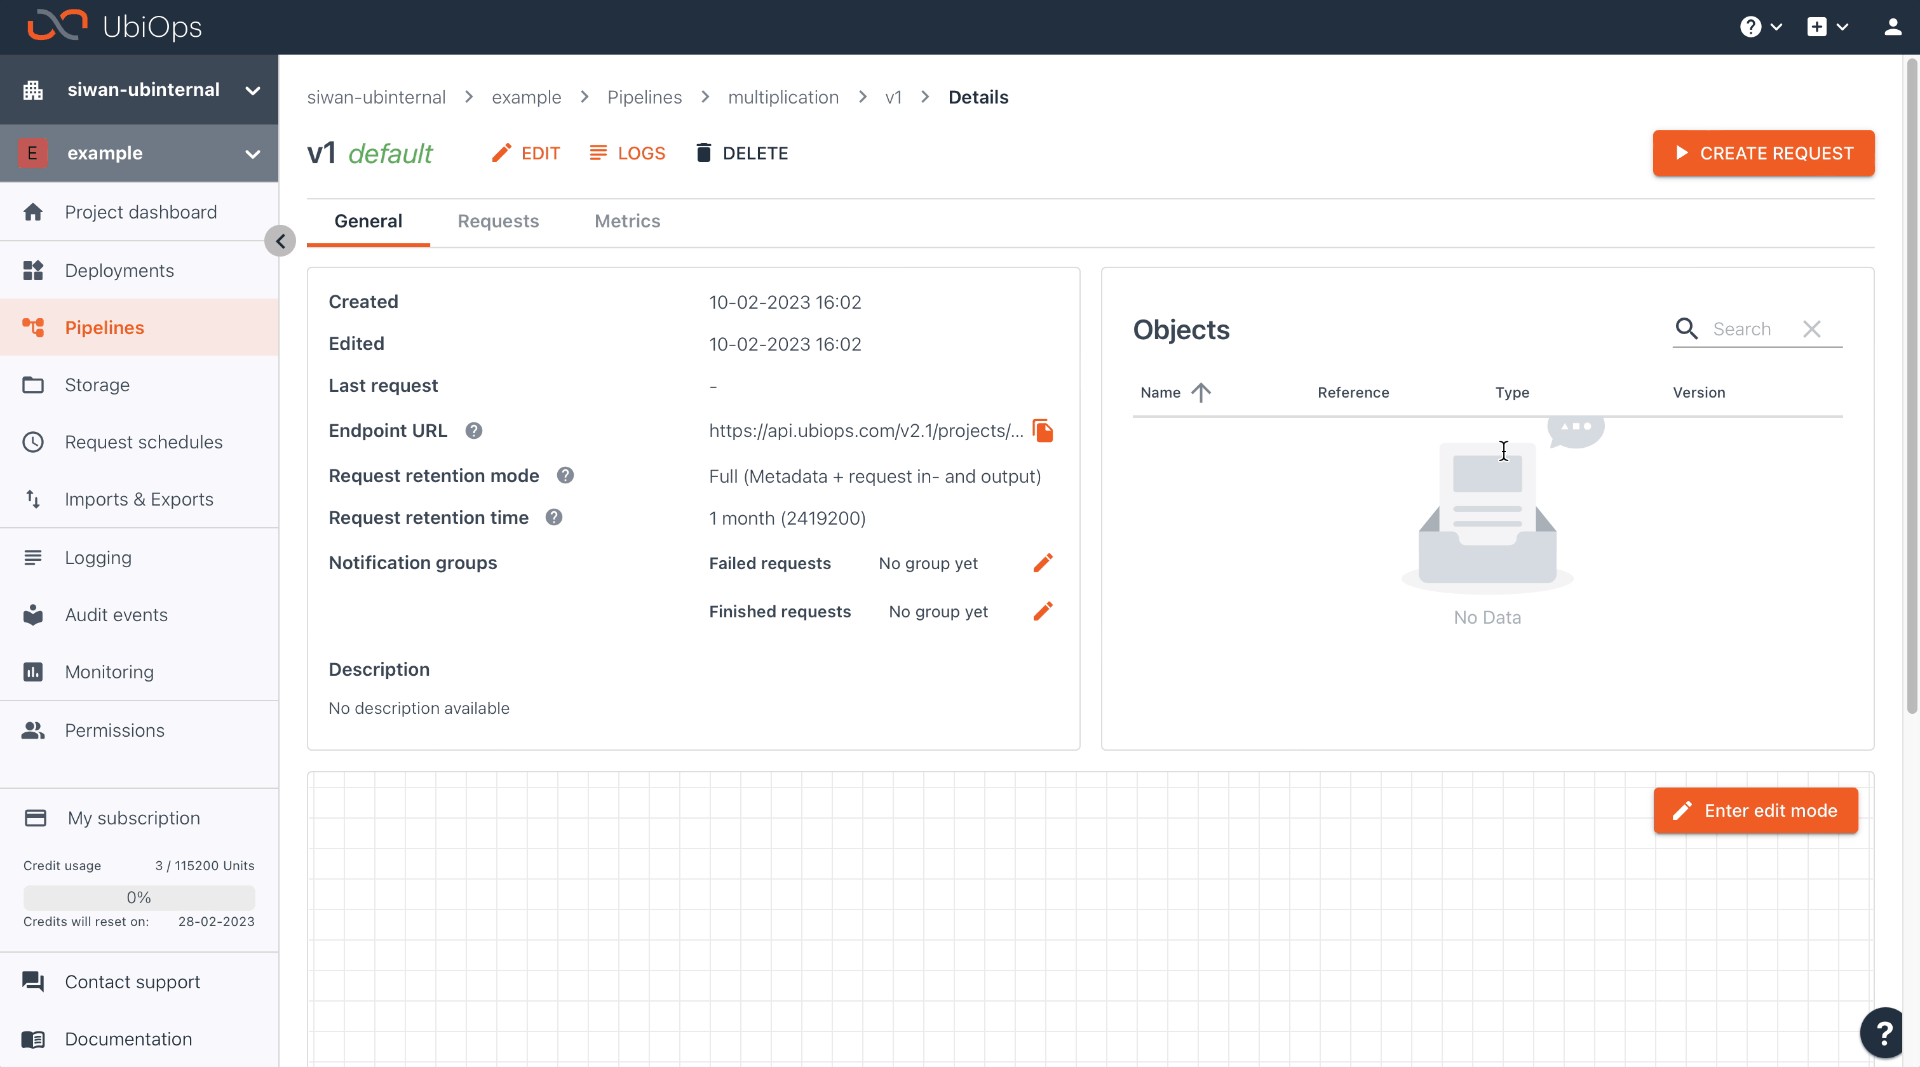
Editing a pipeline version
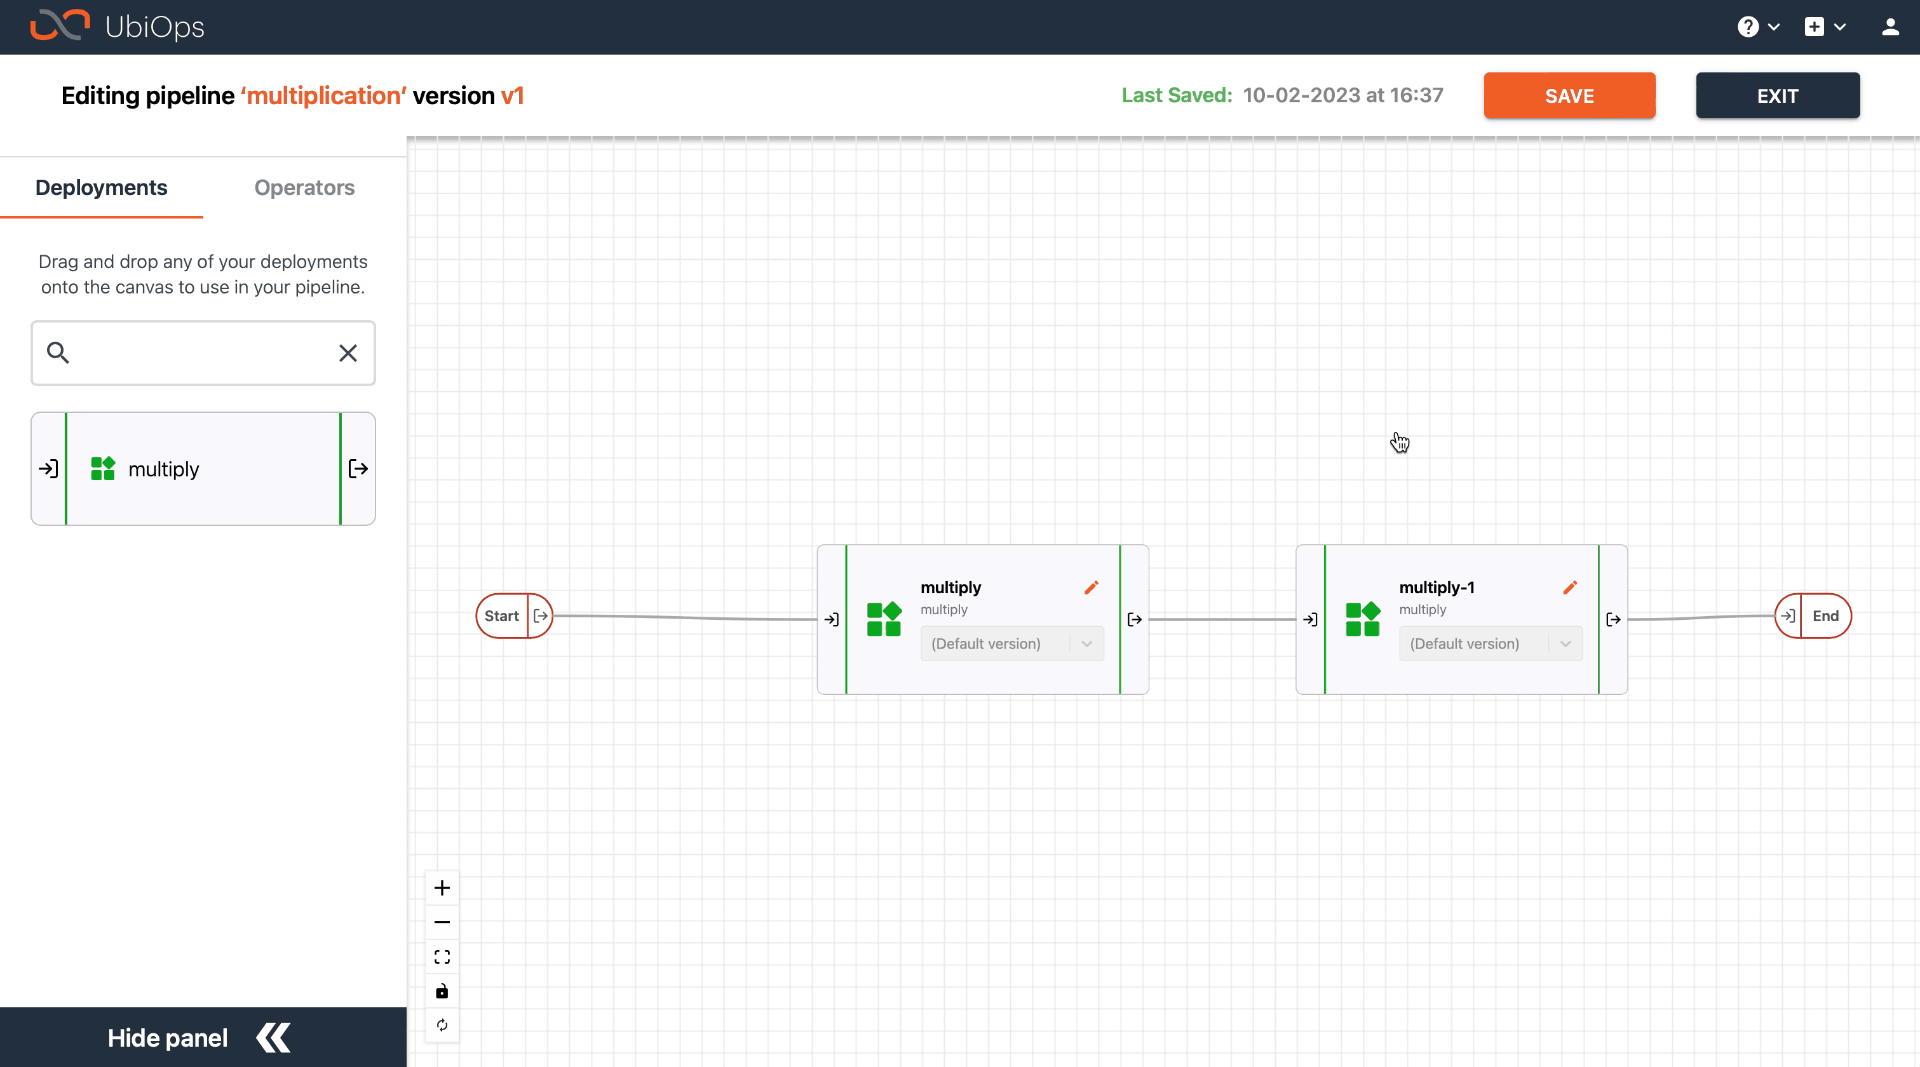
Go to the pipeline version you want to edit by navigating to the pipeline details page and clicking on the version name in the version table. In the General tab, the visual representation of the pipeline can be seen at the bottom of the page: you see all the objects and the connections between them. Click on Enter edit mode to make changes to the pipeline structure of this pipeline version.
In edit mode, you can add objects to the pipeline by dragging them from the left panel to the canvas. Currently, we support the following object types:
- Deployments: any deployments in your project
- Operators: predefined functions for common logic in pipelines
- Pipelines: you can add other pipelines to your pipeline as a sub-pipeline
- Pipeline variables: fixed variables for your pipeline that you can define
Each created object is a reference to a deployment, operator or pipeline. This means that removing the object from the pipeline later will not remove the deployment or operator itself, but just the reference to it. It also means that the deployment should be created first, before it can be used in a pipeline.
Adding objects from script
Adding operators
You can find how you can add operators to your pipelines on their corresponding how-to page, with a more end-to-end example in the pipeline tutorial.
Deployment objects
When you are adding a deployment object to your pipeline version, you have to fill in the following fields:
| Field | Description |
|---|---|
| Reference name | The name of the deployment you want to use. |
| Reference version [OPTIONAL] | The version of the deployment you want to use. If not given, the default version of the deployment will be used. |
| Name | The name you want to give to this object. It must be unique within the pipeline. |
Experiment objects
Enable training function
You need to have the training functionality enabled if you want to add a training experiment as an object.
Training experiments can be referenced to as a version of the deployment training-base-deployment. When adding an experiment object to your pipeline version, you have to fill in the field as follows:
| Field | Description |
|---|---|
| Reference name | training-base-deployment |
| Reference version | The name of your experiment |
| Name | The name you want to give to this object. It must be unique within the pipeline. |
Add pipeline as object (sub-pipeline)
You can add a pipeline as an object to another pipeline. You can use this function to create smaller pipelines for common workflows, and reuse them in (multiple) other pipelines:
| Field | Description |
|---|---|
| Reference name | The name of the pipeline you want to use. |
| Reference version [OPTIONAL] | The version of the pipeline you want to use. If not given, the default version of the pipeline will be used. |
| Reference type | pipeline |
| Name | The name you want to give to this object. It must be unique within the pipeline. |
Click here for an example using the Client Library
object=[
    {
        'name': sub-pipeline,
        'reference_type': 'pipeline',
        'reference_name': 'my-pipeline',
        'version': 'my-pipeline-version'
    }
]
On error policy
It is possible to define the on error policy of a deployment object in your pipeline.

The on error policy determines what should happen if the deployment request fails:
- raise (default): It raises the error so the pipeline request fails too.
- stop: It stops the pipeline request without error. It may not have a pipeline result in that case.
- continue: It continues the pipeline request and uses
Nonefor each output field of the failing deployment object.
on_error policy
The "on_error" policy is set to "raise" by default, the response structure of the API does not include this value, when the policy is left unchanged.
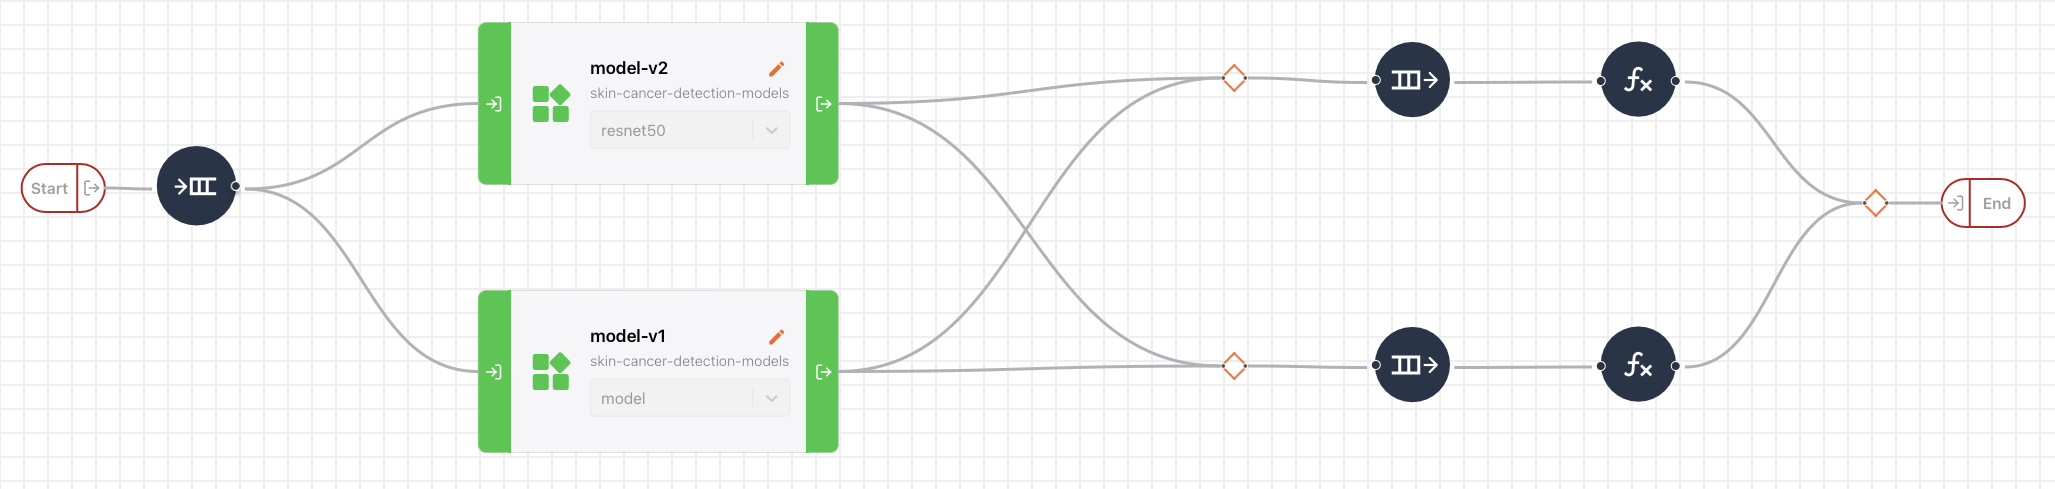
Note that a deployment can also return a list of outputs instead of a single item, see operators create subrequests (one-to-many) and collect subrequests (many-to-one) for more details. If you use a list of outputs by one of your deployment objects, you create subrequests in your pipeline. The selected on error policy affects how the subrequest failures are handled:
- raise (default): It raises the subrequest error so the pipeline request fails too.
- stop: It stops the failed pipeline subrequests. It continues with only successful subrequests to the next object. This will reduce the number of subrequests flowing through your pipeline. In case there are no successful subrequests left, the pipeline request will stop without error.
- continue: It continues with all pipeline subrequests and uses
Nonefor each output field of the deployment for the failing ones.
Adding operator objects
Operator objects can be added to your pipeline version just like deployment objects.
You can also add operators to your pipeline version using the UbiOps Client Library. You can find an example of how to refer on the operators corresponding how-to page, with a more end-to-end example in the pipeline tutorial.
An operator object references an operator of which the logic is defined by us. Some operators can be used for more complex logic in your pipeline, other operators are useful to make small data changes without creating a deployment for it. All operators are described here.
Connecting objects
You can create connections between objects using drag and drop from one object to the other. You can use one or more source objects in a single connection, as long as all destination input fields are mapped.

A source output field can be connected to a destination input field if the data types match. All input fields of the destination object must be provided in the mapping, while the selection of output fields from the source object(s) can also be a subset. Multiple input fields of the destination object may be filled by the same source object output field.
If you don't want to map all destination input fields and want to set the missing fields to null instead, you can use pipeline_null as source object with output field output, or select NULL in the source field dropdown via the pipeline editor in the WebApp.
To connect an object to the entry point of your pipeline, you need to select pipeline_start as source object. To connect an object to the end/output of your pipeline, you need to select pipeline_end as destination object.
Pipeline variables
When working with pipelines, it's possible to create pipeline variables. Pipeline variables allow you to have fixed variables that you can use as input for pipeline objects. Pipeline variables can have the same datatypes (& references) as the input and output of deployments, an overview of this can be found here.
Pipeline variables can be created from the variables tab in the left sidebar in the pipeline editor. Variables can be reused multiple times in your pipeline.

Deleting objects in a pipeline
You can delete an object by clicking on it and then clicking on the trash icon.
This will automatically delete all the incoming and outgoing connections of this object too. Only the reference objects of the pipeline will be deleted, not the actual deployments/operators that are being referenced. If you are working from script, you can use the pipeline_version_update function to add or delete objects.