How To connect models to OpenWebUI
OpenWebUI is a personal AI interface front-end. It allows you to interact with different Large Language Models in a chat set-up. UbOps provides, a platform to serve open source LLms on your own infrastructure. That makes OpenWebUI a perfect extension of UbiOps platform. This how to connect your self-hosted LLM on UbiOps to OpenWebUI, and how to chat with it through the OpenWebUI interface. We will also show how to deploy a small LLM on UbiOps if you don't have it available yet.
All steps in this tutorial are done on Ubuntu 24:
Deploy an LLM on UbiOps
This section describes how to deploy an open-source LLM from Huggingface in a UbiOps deployment and to expose it through OpenAI endpoints. The model can be natively integrated into OpenWebUI. This section can be skipped if you already have such a set-up. Then you can go straight to Setup OpenWebUI.
The first step is to install the UbiOps CLI: create virtual environment and install appropriate pip package:
python3 -m venv env
source env/bin/activate
pip install ubiops-cli
ubiops --version
ubiops signin --token -p "<your-token>"
yaml files that describes structure. Create the following file and save it as: deployment_config.yaml: deployment_name: llama32-llm
deployment_description: LLama32 LLM
supports_request_format: true
deployment_labels:
type: llama32-server
input_type: plain
output_type: plain
ubiops deployments create -f deployment_config.yaml
deployment_version_config.yaml: version_description: Version created via command line.
instance_type_group_name: 16384 MB + 4 vCPU + NVIDIA Ada Lovelace L4
deployment_labels:
foo: llama
instance_type_group_name can be changed to any other GPU instance name available in your project. Then create a code revision for the deployment. The revision contains a directory with 2 files: the deployment code (deployment.py) and an environment file (requirements.txt). First create the deployment.py with following content:
import time
import json
import os

from transformers import pipeline
from huggingface_hub import login
import torch

class Deployment:
    def __init__(self, base_directory, context):
        login(token=os.environ["HF_TOKEN"])
        self.id = "ubiops-id"
        self.model_id = "meta-llama/Llama-3.2-1B-Instruct"
        self.pipe = pipeline(
            "text-generation",
            model=self.model_id,
            torch_dtype=torch.bfloat16,
            device_map="auto",
        )

    def request(self, data, context):
        streaming_callback = context["streaming_update"]
        print(data)
        outputs = self.pipe(
            json.loads(data)["messages"],
            max_new_tokens=256,
        )
        print(outputs)
        resp  = {
                  "id": self.id,
                  "choices": [
                    {
                      "delta": {
                        "content": outputs[0]["generated_text"][-1]["content"],
                      },
                      "index": 0,
                    }
                  ],
                  "created": time.time(),
                  "model": self.model_id,
                  "object": "chat.completion.chunk",
                }
        streaming_callback(json.dumps(resp))

        resp1 = {
          "id": self.id,
          "choices": [],
          "created": time.time(),
          "model": self.model_id,
          "object": "chat.completion.chunk",
          "usage": {
            "completion_tokens": 1,
            "prompt_tokens": 1,
            "total_tokens": 1,
          }
        }
        streaming_callback(json.dumps(resp1))

        return [resp, resp1]
Deployment class has 2 functions. The constructor __init__ authenticates in Huggingface and creates a pipeline with Llama. The request method is called on every incoming request. Due to the mismatch in the Huggingface and OpenAI response strings, the response is post-processed and the new response is passed in 2 chunks to streaming_callback. If a model generates responses on the OpenAI format, they can be passed directly into streaming_callback. More information on streaming a response from UbiOps deployment is on this page. In this example streaming benefits of UbiOps were not utilized, because Huggingface pipeline does not return partial response. It is also possible to return multiple resp like blocks sequentially, which would appear one by one within OpenWebUI.
Then add all requirements.txt:
torch
transformers
accelerate
huggingface_hub
deployment
├── deployment.py
└── requirements.txt
ubiops deployments deploy -f deployment_version_config.yaml -dir deployment -y <deployment-name> -v <version-name>
ubiops environment_variables create --value <hf-token> --secret HF_TOKEN
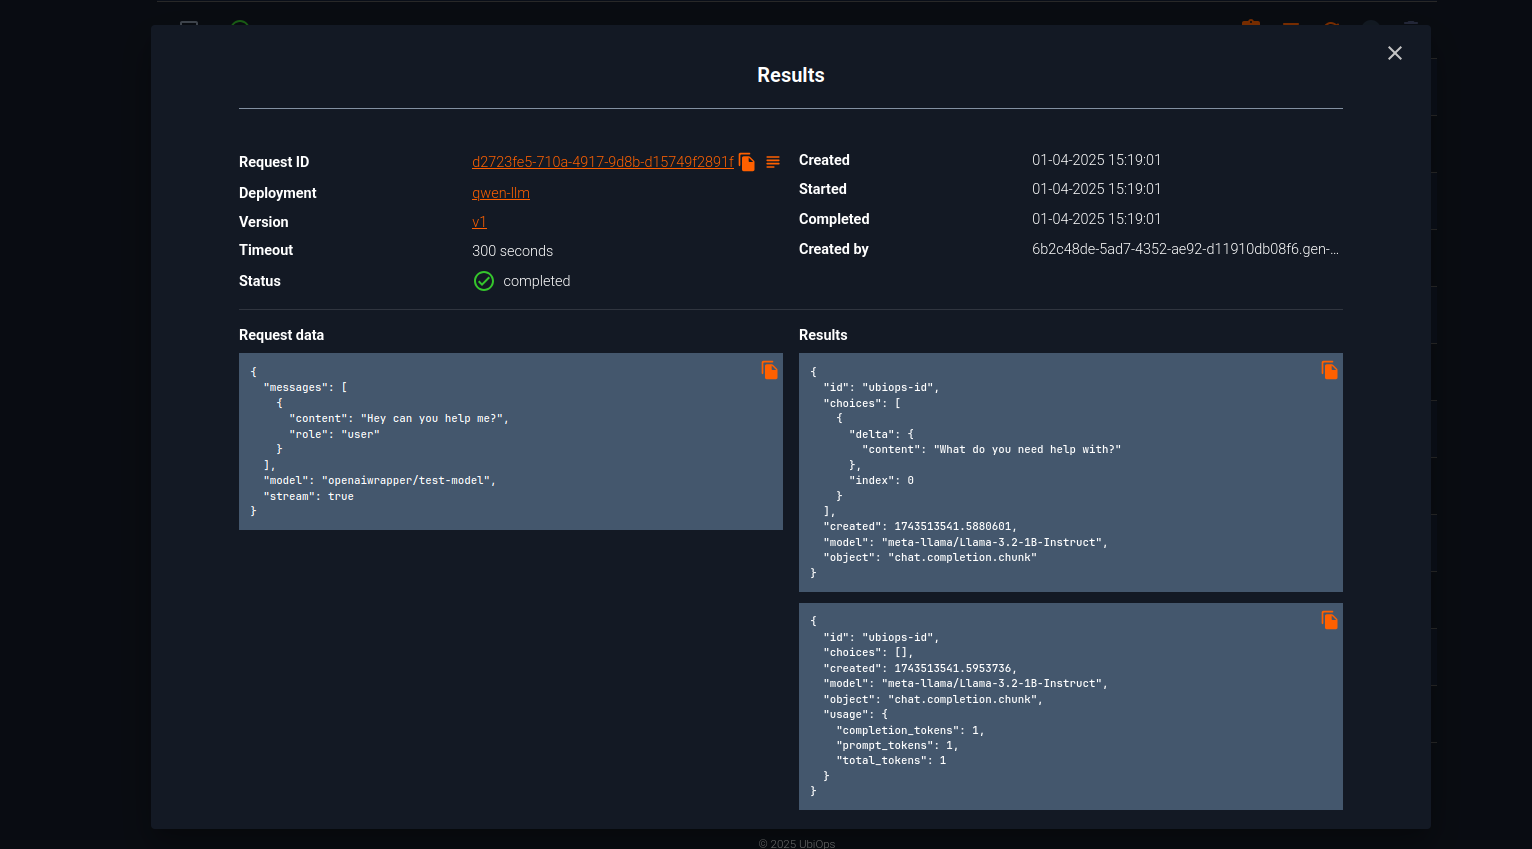
{
  "messages": [
    {
      "content": "Hey can you help me?",
      "role": "user"
    }
  ],
  "model": "openaiwrapper/test-model",
  "stream": true
}
Setup OpenWebUI
This section will describe how to setup an OpenWebUI interface. OpenWebUI runs as a docker container, so you can run it locally if you intend personal use, or on any machine with docker support exposed to a public or an internal network.
The first prerequisite is to have docker engine on your host. You can follow official installation page: Install . After that you can proceed to OpenWebUI deployment.
Pull command will download a container:
docker pull ghcr.io/open-webui/open-webui:main
run command will expose OpenWebUI on a port 3000: http://localhost:3000 docker run -d -p 3000:8080 -v open-webui:/app/backend/data --name open-webui ghcr.io/open-webui/open-webui:main
Integrate using OpenAI API
The last step is to add your model the in OpenWebUI and to connect it to the OpenAI-compatible deployment endpoint. vLLM is one of the servers that provides OpenAI endpoint and can be deployed on Ubiops, this tutorial describes it in more details.
First follow a path: Profile icon → Admin Panel → Settings → Connections.
There press plus on a Manage OpenAI API Connections line.
In a Add Connection pop up window insert:
URL: https://api.ubiops.com/v2.1/projects/<project-name>/openai-compatible/v1/
In a case of on-prem installation
Domain might be different. So URL going to be: https://<your-domain>/v2.1/projects/<project-name>/openai-compatible/v1/
Key: <your-token> without Token keyword in front.
Model ID: ubiops-deployment/<deployment-name>/<deployment-version>/openaiwrapper/test-model
Finally, press plus and then save.

Now your model should appear in the list of models in OpenWebUI:

Your deployment is now integrated as a regular private AI agent:
