Connect to an existing MinIO bucket
UbiOps supports connecting to MinIO storage, given it's (publicly) accessible. Read on to find out how you can connect your bucket to UbiOps.
Configuring the bucket
In the WebApp you can create a new bucket on the Storage page. Click on Create new bucket and select Connect to existing cloud bucket. From the provider list, select S3. As MinIO is S3 compatible, it's possible to connect to MinIO with a few configuration changes.
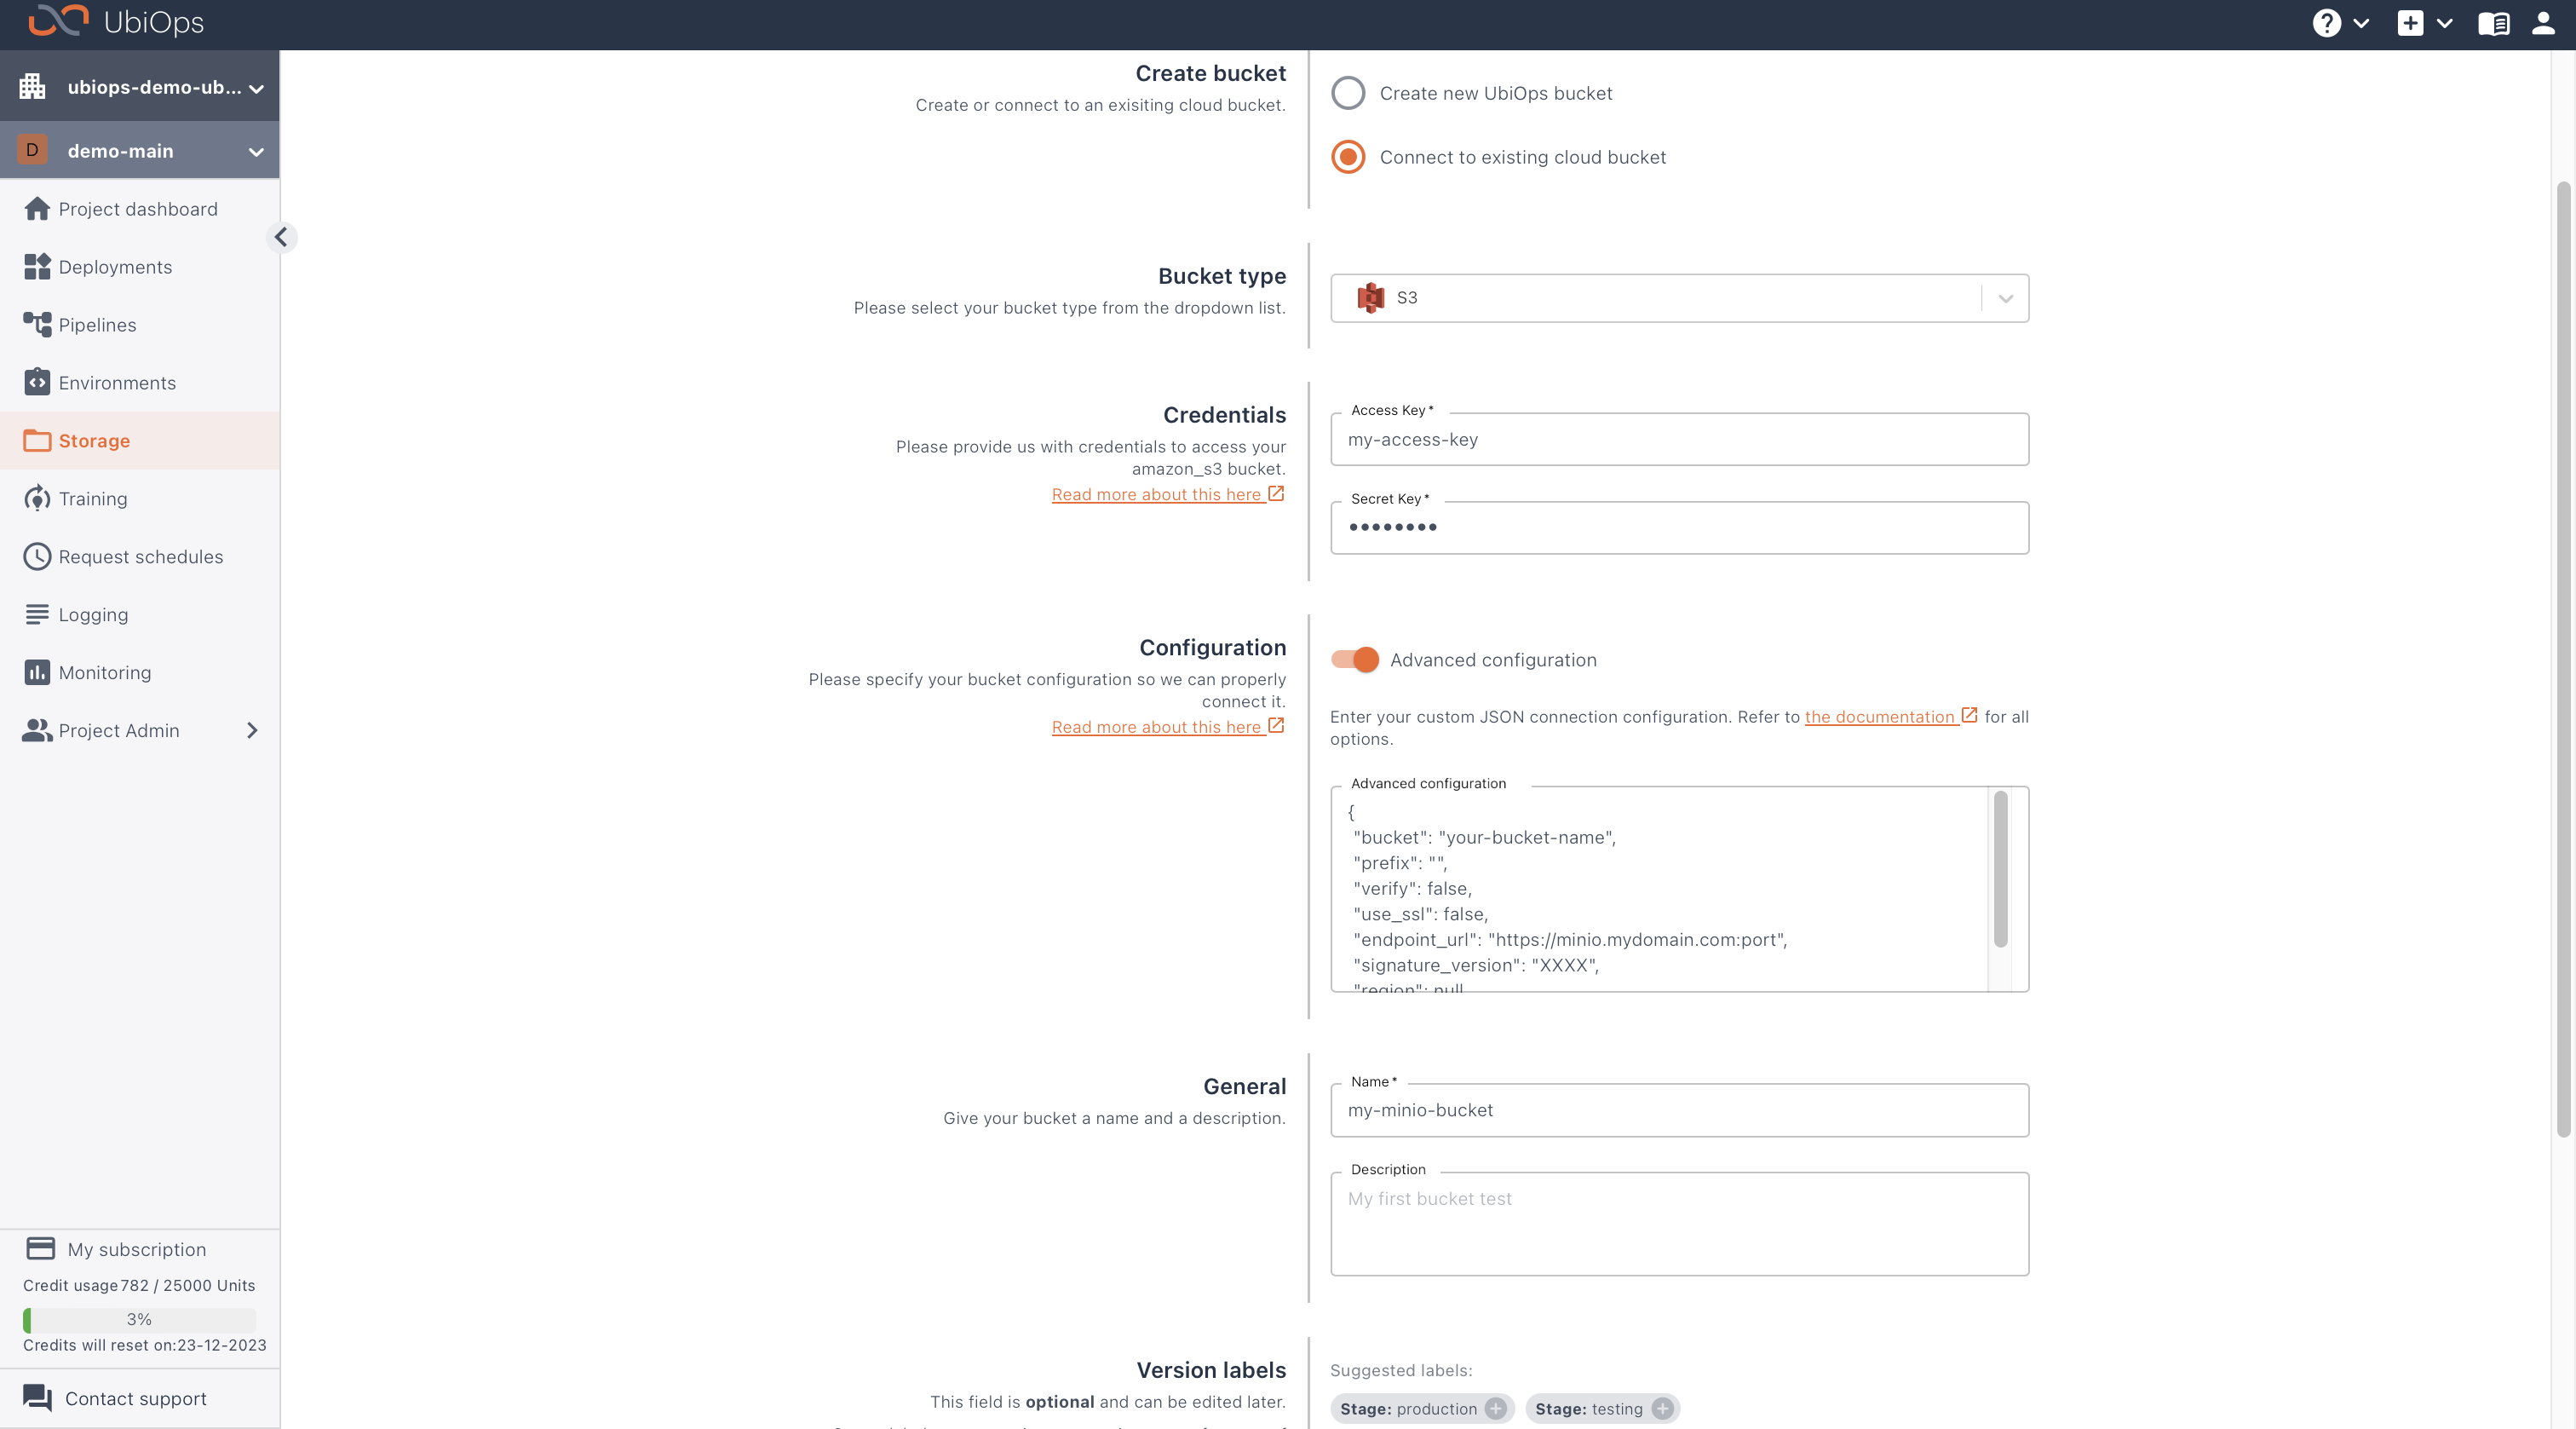
For MinIO, you need to configure:
- Access Key and Secret Key of an Access Key which has sufficient permissions to access the bucket to upload, download and delete files. The Access Key needs full read and write access to the bucket to support all functionality in UbiOps. See the MinIO documentation for more information on Access Key policies.
- The bucket name
- The endpoint_url of the bucket, e.g.
https://minio.mydomain.com:9000 - Optionally a prefix. With a prefix, you can limit the files that UbiOps can access in your bucket. The prefix is added to all paths in read and write operations. Leave it empty to access all files in your bucket.
- Optionally set verify to False. E.g., if your MinIO installation does have a self-signed TLS certificate.
Note the parameters can be tested out with the boto3 libraries. After creating the bucket, you should be able to view and manage files in your bucket in UbiOps via File Overview.